ConvertCalculator is a powerful tool for capturing leads. But what do you do after lead generation? You could follow up from your mailbox, but what if you have a sales team? Or do you want to give your sales process a little bit more structure? Then you need a CRM. Like HubSpot's CRM solution.
Connect your HubSpot Account
NB. First of all, make sure you have a HubSpot account for your business, and also make sure your user profile has the appropriate rights in the HubSpot account to manage integrations.
You can connect your Hubspot Account in the settings/connections page on your workspace. There you find a "Connect" button next to Hubspot. Click the link, log in, and select the Google account you want to connect with.
Sync your fields
The option to send data is available under a button or a link. When you select the button/link, the edit panel appears. In the panel, you can add the action flow "Send data to a Hubspot". Now, a new panel appears where you can map your fields when your Hubspot account is successfully connected.
It's possible to create or update Contacts (update matched on email), create or update Companies (update matched on company name), and create Deals.
After you've selected your calculator element, select the property you want to sync it to in HubSpot. Repeat this process for all fields you want to sync.
That's it! When a user submits a calculator via the button, data is synced to HubSpot. Now you can follow up leads with HubSpot CRM from the generated leads you captured through ConvertCalculator's lead generation calculator form.
How to connect each calculator element with HubSpot
| Field type ConvertCalculator | Field type Hubspot | Notes |
|---|---|---|
| Number | Number | If you add a number field with currency prefixes as “$” you will need to select Single-line text |
| Multiple choice | Multi-line text | |
| Multiple selection | Multi-line text | |
| Dropdown | Multi-line text | |
| Button group | Multi-line text | |
| Formula | Number | |
| Table | N.a. | It is not possible to connect the “Table formula” with HubSpot, but you can connect the Variables, Formulas or elements you applied on tables cells, separately |
| Yes/No Switch | Single-line text | |
| Yes/No Checkbox | Single-line text | |
| Single-line text | ||
| Phone | Single-line text | |
| Order List | Single-line text | |
| Place | Single-line text | |
| Places | Single-line text | |
| Date | Single-line text | |
| Dates | Single-line text | |
| Time | Single-line text | |
| File | N.a. | It is not possible to upload files into HubSpot. You are able to receive files only via submission emails. |
| Signature | N.a. | It is not possible to upload signatures into HubSpot. You are able to receive signatures only via submission emails. |
| Coupon | Single-line text |
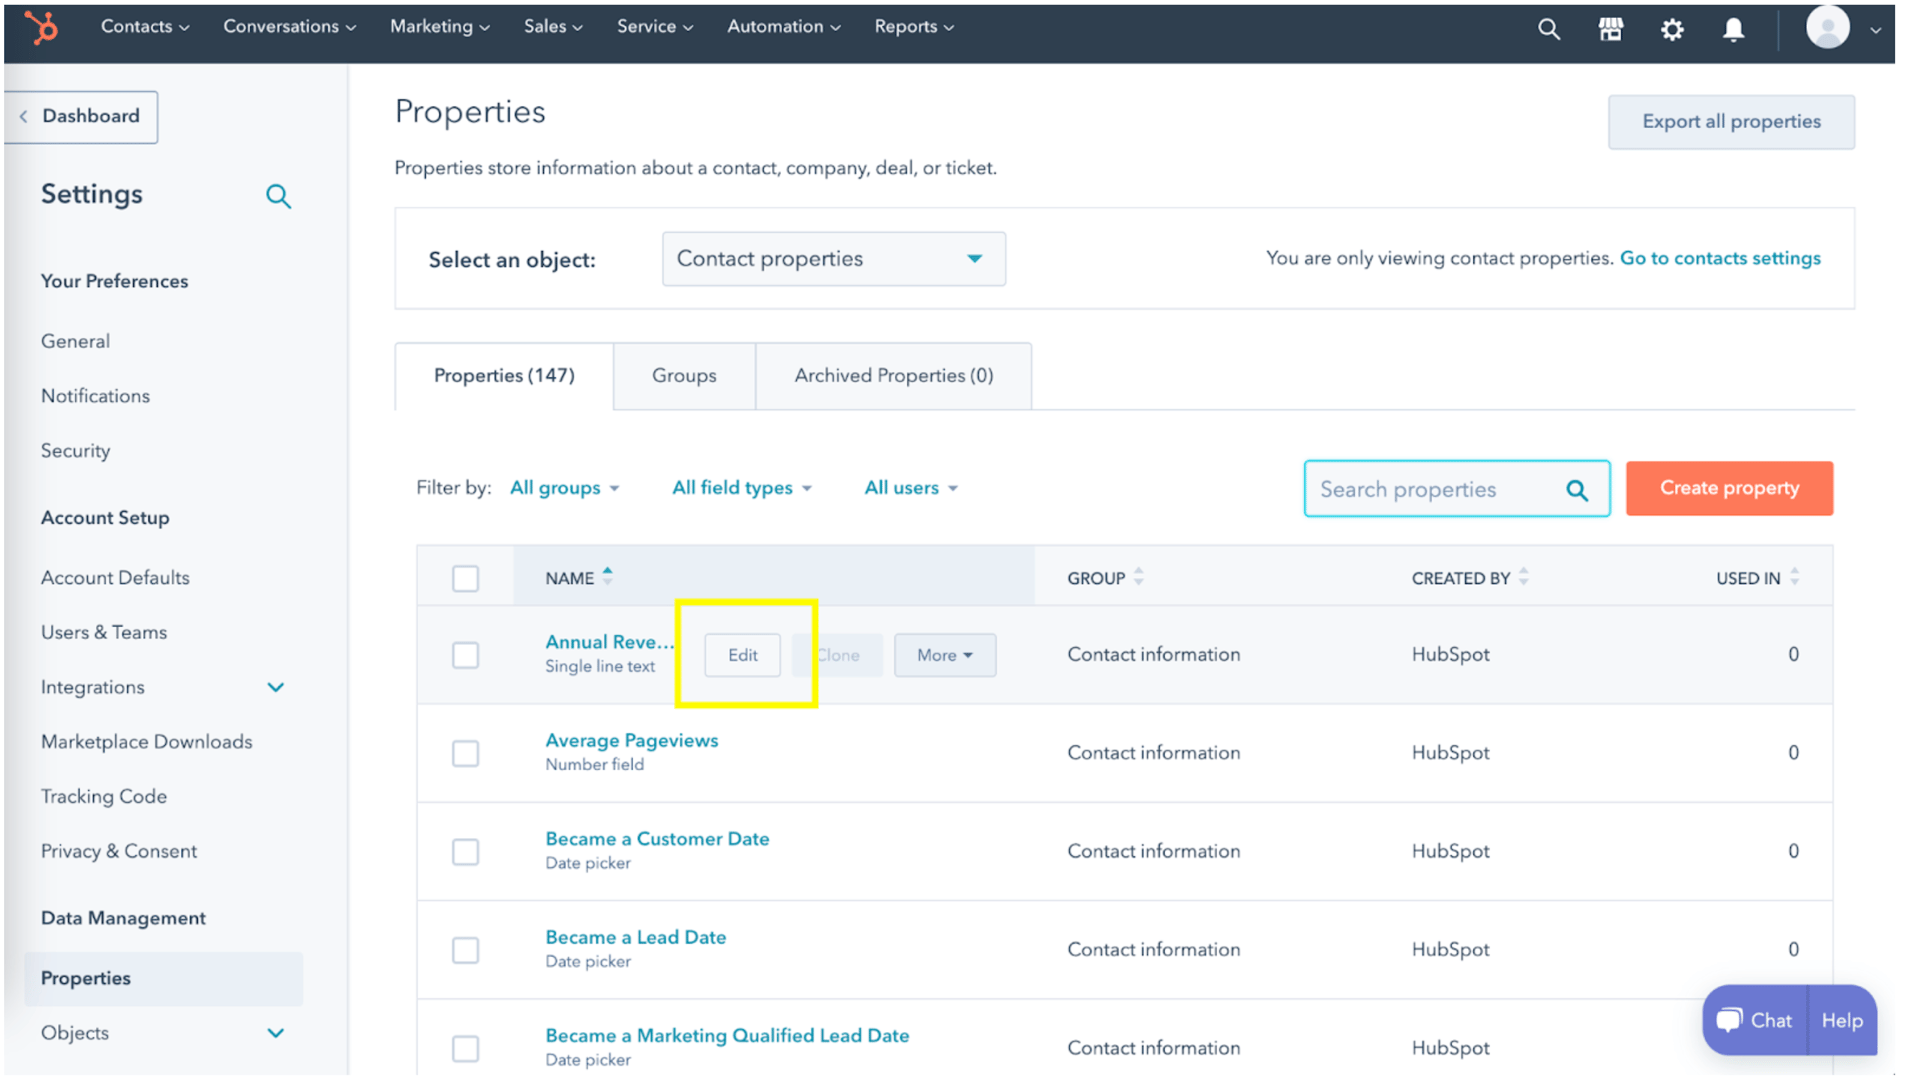
How to create new properties (columns)
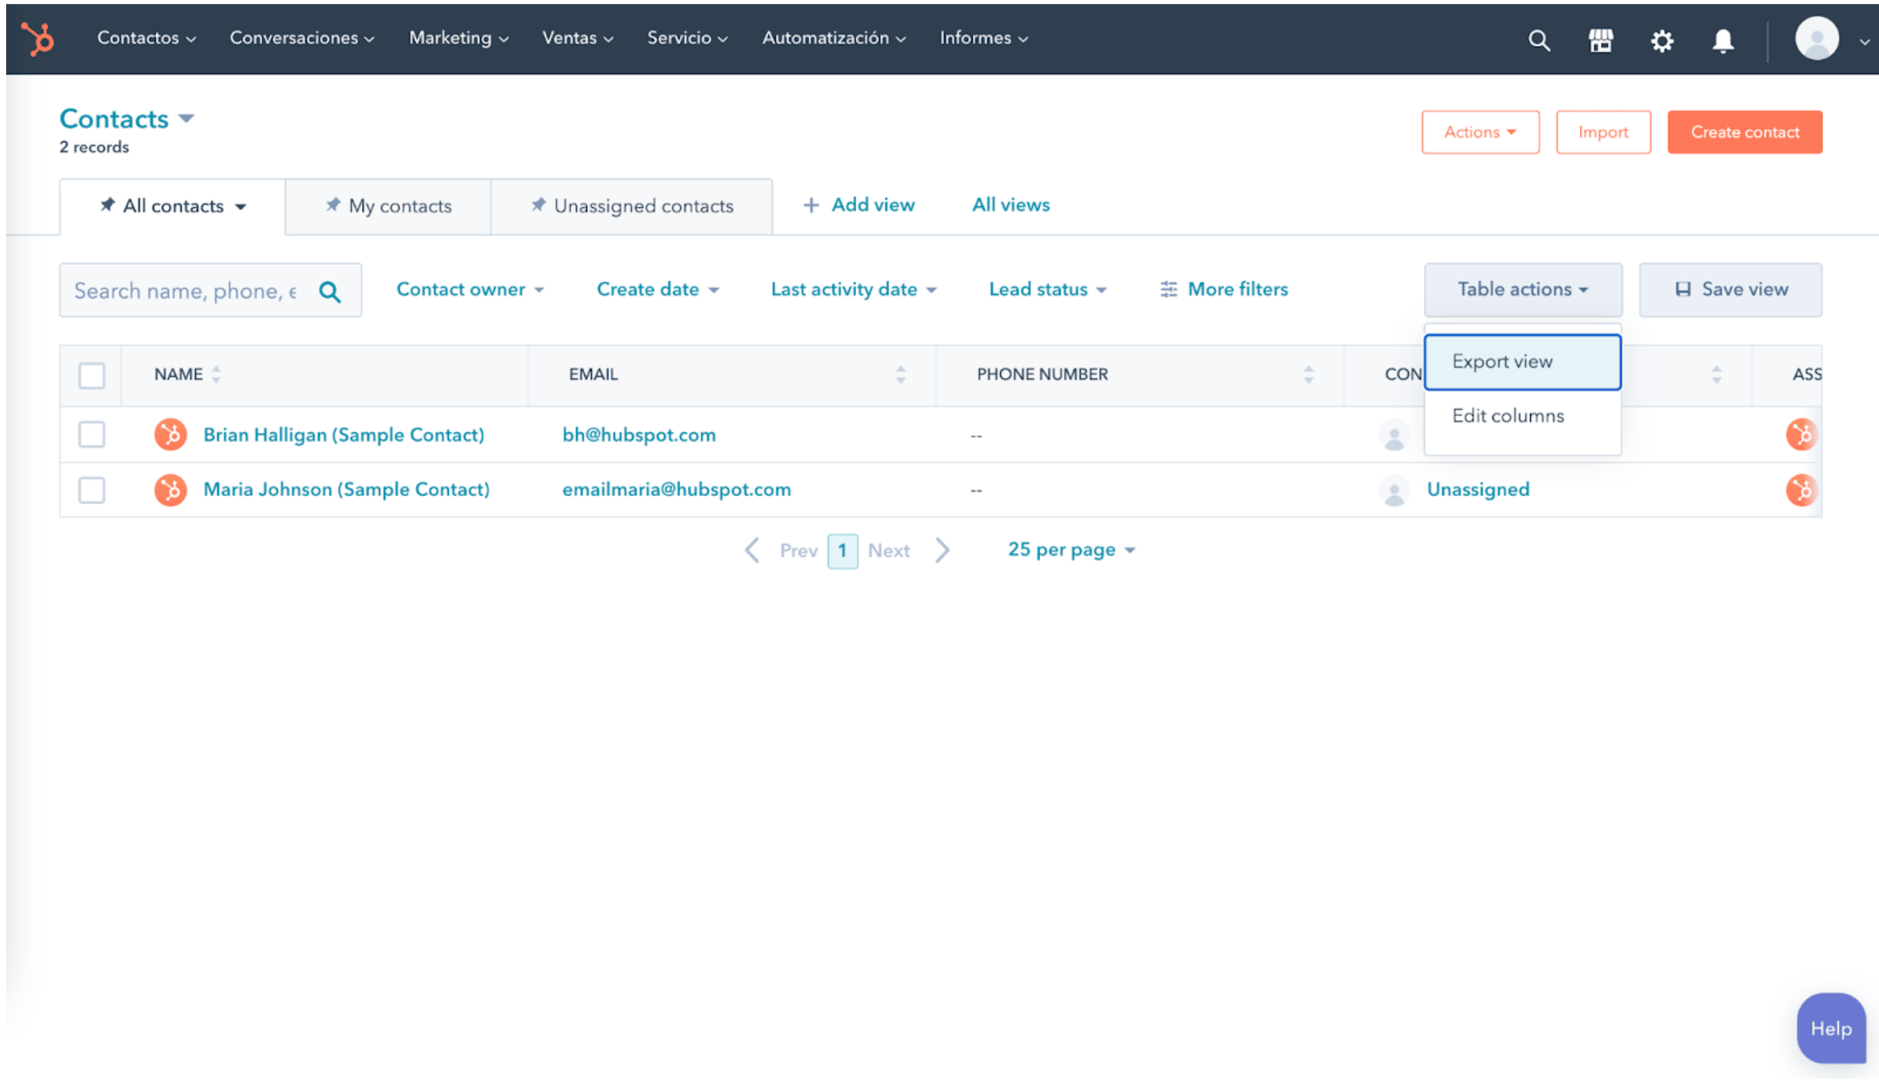
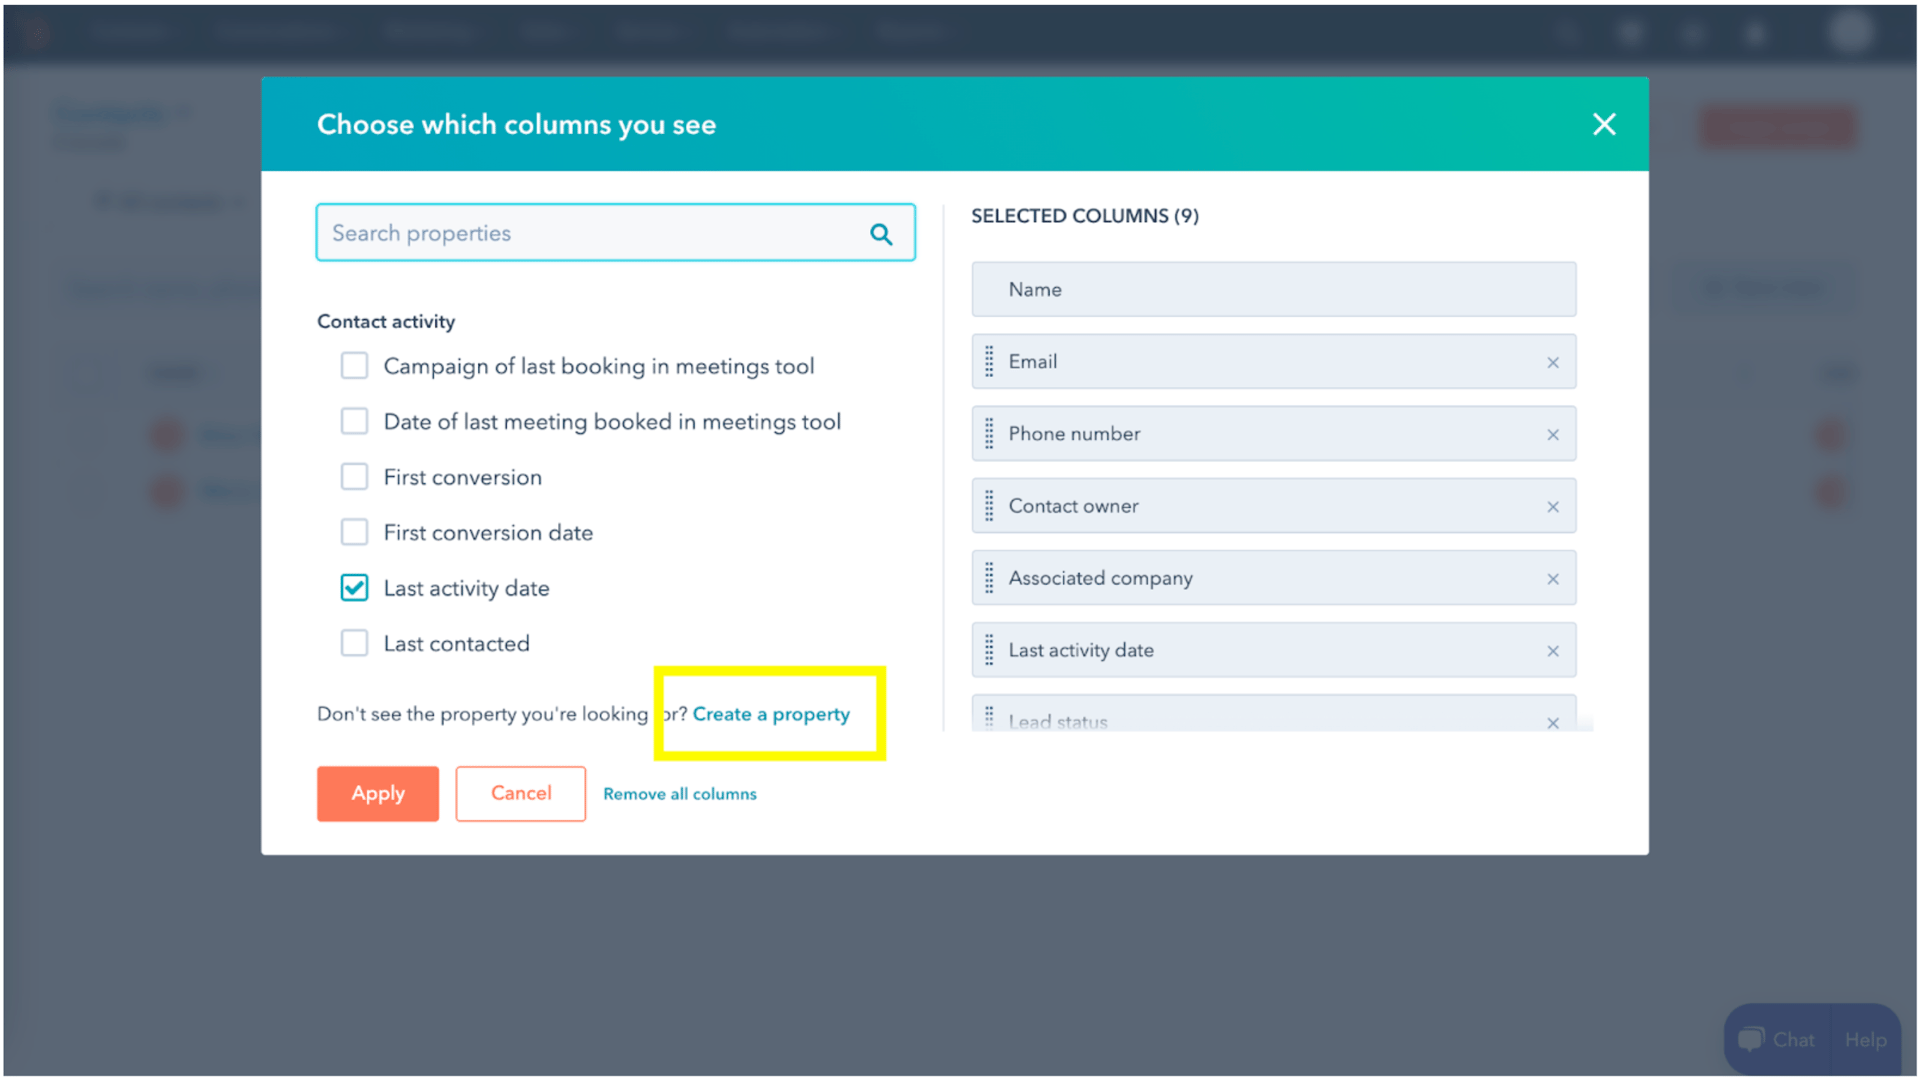
HubSpot provides a lot of properties, but if you can not find the one you want. You can create new columns or edit properties for each contact, deal, company, etc. When you are on your desired page in your Hubspot account (ex., Contacts), you can click on "Table actions"-"Edit Columns"-" Create a property".